“Welcome to the world of tomorrow. A greater world. A better world.”
Captain America
Given that Circus Ponies Notebook died recently, it was time to look for an alternative. I’m still sad that this amazing piece of software has folded. But that doesn’t change the fact that you cannot keep it alive if the programmer has — for whatever reason — moved on. No matter how much you loved it and recommended it. Still using a dead piece of software is simply digital necrophilia. The right thing is to move on as well, no matter how hard it is.
During the last couple of days I tried out OmniOutliner (here in short: OO) as an alternative.
I’m going to describe the software first, compare it to CircusPonies Notebook (regarding advantages and disadvantages and focusing on things you have to do different), give a few additional tips on using it, and then talk a bit about migrating the CPN notebooks to OO.
As usual this posting comes without any warranty. Follow this information at your own risk.
Note that I’m still in the early phases of using OO and I’m sure there is more to know. I also know that there are better (read: faster/more automatized) ways to migrate the content. If anyone can write a program that is able to read the CPN files (they are folders after all) and produces an OmniOutliner file (also a folder) … well, that would deal with migration in an instant. After all, you can access the structure and the attachments when you look into the files. The text content seems be simple .xml files (compressed for each page in CPNs case, one .xml file in OO) and the structure seems to be quite easy to reproduce. However, that is beyond my capabilities — at least in a reasonable amount of time. I focus here on migrating the content by exporting the CPN notebook to .opml, opening the file in OO, copy-and-pasting it into (a) new Outline(s) and moving the images (and other media) manually.
And yep, this is going to be a monster-posting. There is a lot to cover and I did not have the time to make it shorter.
But let’s start with OmniOutliner.
OmniOutliner — A short overview
OmniOutliner was written by “The Omni Group”, which has been around for a while (founded in 1989). I remember them fondly because they did port “Quake 3: Arena” to the Mac ages ago (pro bono) and — as far as I have heard — they have very high quality standards.
Today they are well known for business software like OmniFocus (task management), OmniGraffle (flow charts and the like), or OmniPlan (project management). In short, this isn’t a one man (or woman) project, it’s a professional organization. While you can never predict whether a software will be available in the future, I have confidence in that company.
(If they fold unexpectedly too, I’m going to proclaim that I have confidence in Microsoft. Who knows, if I am cursed, I might as well put that curse to good use.)
One thing about their products — they are expensive. Expect to pay about 130€ for a Mac and iOS version of OmniOutliner. Given how frequently I use (and will use) the software, I can live with it. But it’s no CPN pricing. There are also different versions available (always hate that). Basically, if there’s a professional and normal version, the normal version is usually crippled. I went with the professional version, because I wanted Word export, column controls and a few other things.
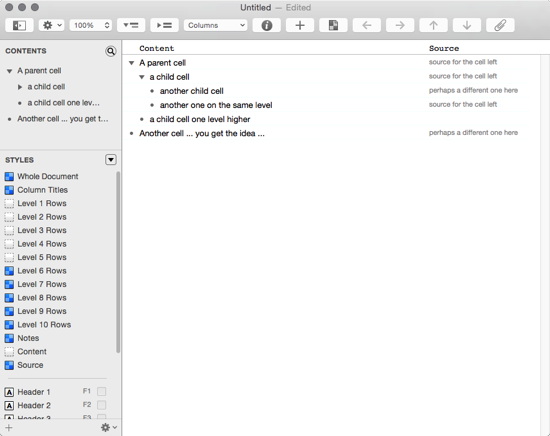
OmniOutliner is what the name says — an outliner (see this posting for more information, OmniOutliner is like Circus Ponies Notebook in this regard). In contrast to CPN, there’s no notebook around it, it’s “just” a “simple” outline. An OmniOutliner file is comparable to a single CPN page. However, you have a lot of control how the content looks like, both regarding themes and what kind of information you want to store. You can, for example, add columns to the cells (e.g., for information on where you did get the content of a cell).

You have a lot of control of the style of the outline and individual cells via the Inspector (shown in the window on the right side).
There is also a sidebar on the left side of the main window. It gives you another way to access the content via the CONTENTS window (you can selectively expand parts of the outline there, which is very useful if you have a couple of headers you want to jump to quickly). When you click on something in the CONTENTS view, you focus on it, allowing you to see only this entry (and its child cells). Click on “CONTENTS” to see everything again.
There is also a quick access to the STYLES. You can change the style for the document and for individual cells (below the horizontal line). Unfortunately, I use the cell formatting much more frequently than changing the overall formatting, but given that the document formatting is above the individual formatting, it isn’t that easily accessible. I guess Omni prefers overall styles above individual styles, but given that the content I have is more diverse and doesn’t follow a simple “indent level x means style y”, it makes it inconvenient for me.
Note that you have to select a cell (or parts of the cell) and click the check-box next to the formatting style to apply it. Just selecting the style name allows you to change the formatting styles with the Inspector window. Also note the shortcut keys (goes by top-down order, but you can select two different function key settings in the preferences).
If the toolbar looks different in your version, I have customized mine a bit.
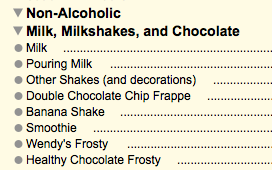
Per default you have one column (“Topic”) that allows you to add additional “Note” information below it. But you can add, e.g., a new column (e.g., “Source”) and have it displayed or hidden from view. You can also selectively format columns.
The image above is actually my default template, just without content (see below):
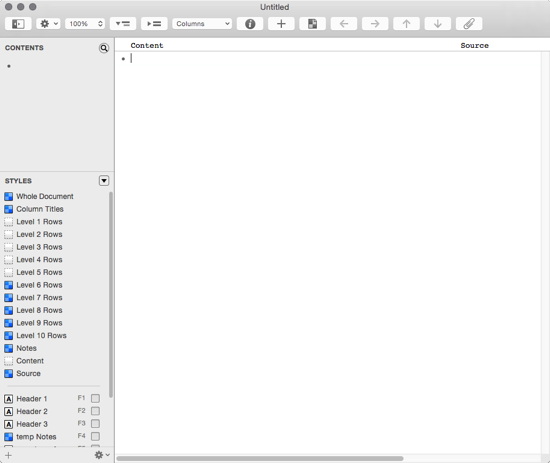
I have added some automatic formatting for different levels. Starting with indent level 6, the text color is changed to red. I use it as a warning when I have too many indents, something that can happen easily with an outliner. I also use a style to have the Source column text in light gray, and my usual header structure (highlighting in green, blue, yellow, etc.). I do it manually because sometimes even text on the highest level (not indented, i.e., not a child cell) is just text, not a header.
So much for a short introduction of OmniOutliner. How does it compare to Circus Ponies Notebook?
OmniOutliner vs. Circus Ponies Notebook
There are a few things OO does better than CPN and some things it does worse (going by my criteria, yours might be different). I use outlines mostly for keeping (academic) notes. So one thing that is really important to me is always having the source information available. Yet, I don’t want to have the source interfering with reading the information.
In CPN, the source information (in the form of authorname_year) was a keyword attached to each cell (essentially a tag). In OO I try to use a second column for it. This means each cell has (at least) two columns, the main/default column for the actual content (called “Topic” by OO per default, I changed the name to “Content”) and a source column (called “Source”).
So, using it this way …
What OmniOutliner does better than CPN
Columns: OO offers columns. You don’t only have one cell text, but this cell can be separated by columns. It’s a strange concept which — at first glance — makes it appear similar to a spreadsheet app. But the cells can be indented (becoming child cells of the cell above it) and the columns still apply to all child cells. Columns do have their uses, e.g., imagine planning a project and using one column for the task, the other for the required material or the people involved. Or any other kind of meta information. I use a column for the source information of the text I store in the outlines. It’s crucial in Academia. BTW, you can show/hide columns and change the width and order of the columns.
Templates: OO prefers to use templates. While you could add most of the auto-formatting in CPN, OO makes it easy to do so. You can create custom templates and you probably should. Just imagine you can prepare different page styles. You can also easily apply different templates. That becomes a thing when you change a template (did it a couple of times).
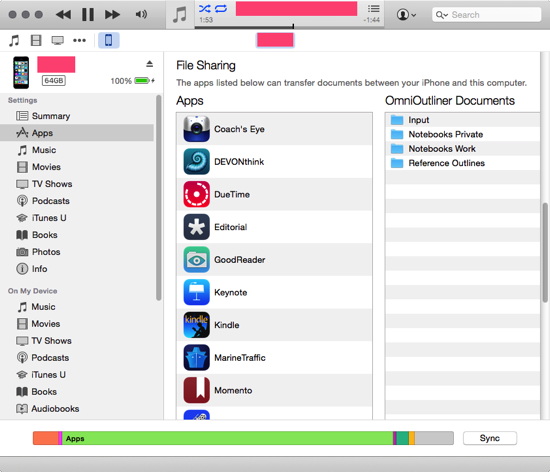
iOS Support: Probably one of the strongest arguments for OmniOutliner. The iOS app works beautifully (tested it on my iPhone 5s). Beautiful functional interface, works fast enough (not exactly snappy, but it’s workable). And best of all, you can simply drag and drop whole folder structures into the OmniOutliner File Sharing window in iTunes. As far as I know, there should be syncing, but it’s something I don’t use. I actually prefer manual copies. And these work very well.
I wouldn’t underestimate that folders work as well. If you have a lot of outlines, you need additional structure. And folders provide these structure — like Divider Pages in CPN.
Navigation on iOS is pretty straightforward.
Haven’t tested it yet, but I would stick with the default fonts. You can be reasonably sure they work on iOS as well.
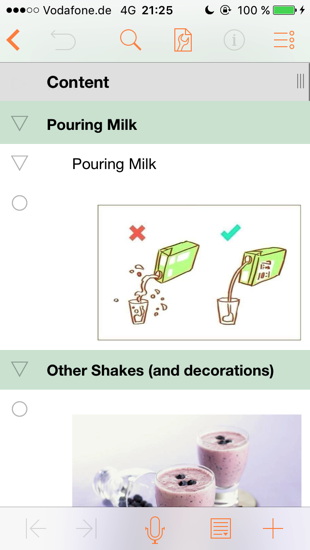
The outlines are easily readable on iOS devices.
Better Mac OX X and DEVONthink integration: OO files are supported by OS X’s Quick View. Select the file, press SPACE, and you can have a look at the content. Even expand and fold cells. If you use DEVONthink, OO files are shown with the content window. You should also be able to open OmniOutliner files via your Webbrowser (both local). See Application Links Browser Start Page (treat the OmniOutliner file in DEVONthink like any other file and copy the DEVONthink link). I don’t store my Outlines in DEVONthink, because I copy the manually onto my iPhone and this works best with normal folders. With DEVONthink I would have to drag them first onto the Desktop and then into the iTunes File Sharing window.
Adding media files to subcell (child-cells): In CPN, when you close (fold) a parent-cell to hide is child-cells, it expands automatically when you add files to it. OO expands it the first time, but when you close it, it stays closed. This allows you to quickly add files to different parent cells. Just imagine you want to add images to “Project 1” and “Project 2”, both cells in the outline. After dragging and dropping the image below the “Project 1” cell (you’ll see a green plus sign and the mouse position determines whether it will be added as child of “Project 1” or on the same level), it expands. But when you close it, you can add further images without expanding and closing. That might not seem much when it comes to two Projects, but imagine 10 or 20.
You can see the actual text in the Contents window: With the Contents window, you can drill down into the text. In contrast the Contents bar of CPN, it goes by indent levels, not by dividers and pages (they don’t exist in OO). The plus side is that you can drill down, but on the negative side the Contents window can become overcrowded (even with truncated text). I suggest using only headers, not longer text on the top level of the outline.
Still, overall it’s a plus that you can use the Contents window to focus on parts of the outline. You can, for example, expand all cells, then use the Contents window to focus on a specific subheader. Or expand and collapse cells selectively on the level you have focused on. Note: Make sure you have clicked on the main window, not the Contents window, when you expand all cells. Otherwise you expand the whole content ouline in the Contents view.
There seems to be a version control: Found out about it by accident, but prior versions of an outline seem to be saved as a version you can revert to. Don’t use this feature, not sure whether it’s OS X standard or OmniOutliner specific, so I have to get back to it another time.
What OmniOutliner does worse than CPN
OmniOutliner doesn’t warn against possible user errors: CPN warns you per default when you do something potentially bad (e.g., deleting pages). OO lets you remove columns, sort an outline, and do other things without warning. When you start using it, be very careful regarding the effect of your actions and if in doubt, have a look at “undo”. It’s nearly a neck-breaker, because let’s face it, humans make errors. I don’t want hand-holding, but I want a safety rail when I’m jogging past a chasm.
Sorting is a high risk: With the lack of warnings probably the greatest risk factor for a major error. OO can sort the cells, but apparently, it sorts the children as well, even if they are folded in. So if you have multiple cells and child-cells and on one levels you have headers, and you decide to sort the outliner, the children get sorted as well. Yep. Different than CPN and much, much worse. If I could, I would disable the sort function. At least, there do not seem to be any keyboard shortcuts for it, so there’s at least that. Still, if you are used to Auto-Sort from CPN, you’re in for disappointment.
Cell editing requires an additional keypress: When a cell is highlighted, you cannot simply write text. You have to press Escape first. Of all the keys, it’s probably the most un-intuitive, but at least one of the simplest to press (top left of the keyboard). Pressing escape puts the cursor into the default cell column of the currently selected cell. It’s the “Topic” column or whatever you have renamed it to if you changed the name of that column. It takes some getting used to.
If you press Enter when you have highlighted text in a cell then that text is deleted! Imagine you have highlighted text in a cell to apply a text style (e.g., bold, or with the styles you have predefined). The text is now bold and you press Enter to finish editing and add another cell (which you would do in CPN, and you can define what Enter does in OO Preferences to mean “Create a new empty row”). Result: You create a new cell below the one you had edited, so far so good, but the text you had highlighted (likely because it was important) is now deleted. Yep. When you start using OO, take care what happens when you work “as usual”. Again, no warning, the text is just deleted and you are likely already focusing on the content in the newly created cell. You have to press “Escape” first to stop editing, then press enter! Frankly, there’s an advantage that OO looks different by default than CPN and you might leave it that way. You need some new muscle memory for this program. (Alternatively, you could press the arrow keys instead of Escape, but I’d go with Escape here.)
If you split a cell, the content of the other columns is not duplicated: If you use a column for the source information and you split the text of the content column into two cells (Ctrl + Enter does the trick at the current cursor position), the content of the other cells ends up in the cell that contains the text after the split. It is not duplicated like the keywords in CPN. So be careful when you split one cell into two cells.
Some functionality is not available in OO (as far as I can see it): You lose the Multidex, there are no sketches, no stickers and the like. It’s an outline, not a skeudomorphic notebook. If you use a column for the source information and want to get a quick overview of the sources you have used, you can change the column type in the Inspector from “Rich Text” to “Pop-Up List”. The content of that column will be displayed as values in the Inspector. To do so, you have to highlight the column, go to the Inspector (Shift + Cmd + I, or simply the “i” icon in the toolbar) and select the type in the column panel. You have to change it back to change the text.
Space around the images: Sometimes there is a bit too much space around inserted images. I’m not sure yet why. It’s not white space around the times and it seems to be proportional to the image size.
Some images are displayed as icons: Also not sure yet why. It seems to be connected with the use of transparency, but that’s only a hypothesis. If you can live without transparency and want to see the image, probably best to remove it (e.g., in Graphic Converter: Remove Alpha Channel, take note which background color you have currently selected).
You can’t copy-paste into one column only: OO goes by cells, even if they have different columns. To use Excel terms, row beats column. They are not on equal footing. So you can’t just select a column (e.g., for the source of the content) and paste text into it (here: the source information). If you are used to the “Assign Keyword” function of CPN, you’re in for a disappointment.
Update: 2016-02-15: Bruno did write a comment sharing his Apple Script. It works like a charm. Thank you Bruno. 🙂
I haven’t found an easy solution yet. Sure, you can select the source column and go with paste and arrow down, but that takes a while. AppleScript might be a solution here, but that’s beyond my current capabilities. Assigning a default value for a specific column in the cell might be a way as well, but I haven’t found out a way to do that either (e.g., if it were something unique, you could simple do a search and replace all on the outline and replace it with the source information.
Note that using the default column for the source information (you could copy-paste in it) is not a solution I would warn against using the default column for anything but the main piece of information.
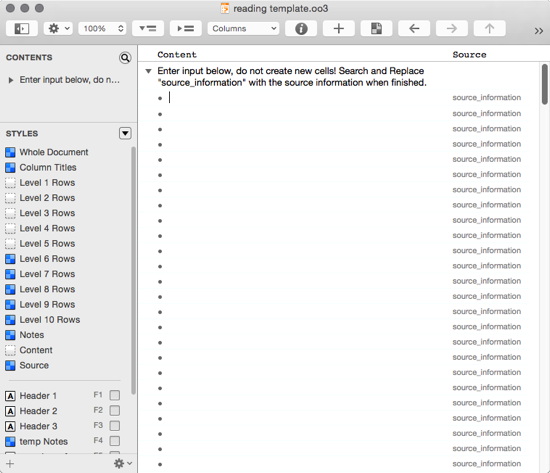
A work-around might be to create a template with a couple of hundred cells with “source_information” in the source column. Write it once, then select all cells (press escape to stop editing the cell first), copy and paste, select all, copy and paste, and so on. The number of cells will increase exponentially (1, 2, 4, 8, 16, 32, 64, 128, 256, …) so stop after about eight repetitions. Use it as a reading template, put the content into the main column (“Topic”, in my outlines “Content”) and just don’t create new cells. After you are finished reading a source, search and replace all “source_information” with the actual source. Hmmm, see the image below, but I haven’t tested it out yet.
The position of the handle to move a cell with an image is at the bottom of the cell: You can use the bullet points of cells to move them. When it comes to text, the bullet point is at the top of the cell, but with images, it’s at the bottom. This makes it inconvenient to move images (I usually move top-down, so I have to scroll past most of the image to reach the bullet). Giving each image a text parent cell (with an image description works here, but sometimes you just want to have the image).
You cannot edit images or other media files when you have added them to the outline! CPN allows you to do this although it probably isn’t recommended. If you do it in OO, e.g., double-click an image to open it with your default image viewer/editor, change and save the image, you get this message the next time you save the outline:
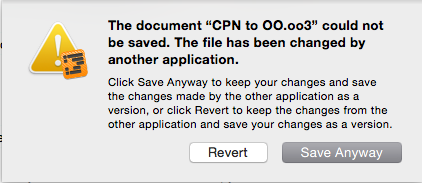
If you select “Save Anyway”, the edits you did with the image vanish. Well, they are saved as a prior version you could revert to. If you select revert, all changes you did in the outline after editing the media file vanish (again, they end up as a version you can revert to). So, if you want to change an image or other file in your outline, drag it onto the desktop, edit it there. Then delete the image in the outline, and drag the edited file into its former place.
(BTW, this isn’t as bad as it might sound. It’s something to know (and avoid), not a showstopper.)
A few Tips on Working with OmniOutliner
Learn to love Escape: Until I find a way that allows me to directly edit text in the main column of a selected cell, pressing Escape to start (and stop!) editing has to become a habit.
Check the Preferences: There isn’t that much you can configure in the Preferences, but some of the things might be very relevant to your work style. So check them out when you start using OO. It helps to create screenshots of the settings when you have found a way to work easily. If you have to reinstall everything from scratch, you don’t have to try to remember which settings you did chose.
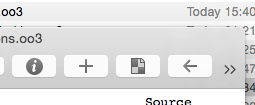
Configure the toolbar: I found it useful to configure the toolbar to my liking. Just right-click it to access this option. Expand All, Collapse All (not shown on image), the inspector, apply template and move cell left (“Move Left”) are among the most frequent buttons I use. Thus, I have them available even if the window is relatively small.
Use the contents window: It’s really helpful for quick navigation and selective focus (and expanding/collapsing the subcells of said focus).
If you migrate, stop using CPN: Given that some things are different (e.g., moving cells up and down with ctrl cmd + arrow keys, or how highlighted text is treated when you press Enter) you need some new habits. Best stick to one program for a while.
Use Templates: If you need default content, create an outline as you like it. Take care what is visible, what is selected, the width of the columns, etc. Then save it as template. Given that OmniOutline deals with single outlines (pages in CPN), you (likely) can’t work effectively with one outline per (former) notebook. So you have to deal with many more outlines and use OS X’s folder structure (or DEVONthinks group structure) to simulate the notebook structure. Given that you have to create a lot of pages, templates are useful here. You can also save this template as a file and duplicate it in the Finder. Sometimes, it is easier to first create the files this way.
BTW, you can create folders in the Ressource Browser. Just right-click on a template, select “Show in Finder”, and change the structure of the files/folders there. I have my default template selected as default template (can be done in the Preferences, have a look at them), but some other templates in a “My Templates” folder.
Keep an eye on the column widths: Given that you can use columns and, e.g., when you split cells the other information is not duplicated, you might want to have all columns in view all the time. So change the column widths. To do this, you have to have the column headers shown (View – Column Headers). The vertical lines to change the widths become visible when the mouse is over the column header bar.
Hide columns for printing or exporting: If you don’t need specific columns exported or printed, just hide them. Right-click on a column and select “Hide Column”. CAREFUL!!! The next option is “Remove Column” which OmniOutliner does without giving you any warning. I mean, seriously, Omni, are just nuts?!? That’s an accident waiting to happen. So be very careful here.
Keep Backups: Given that — esp. in the beginning — you might make mistakes that lose data, keep backups. Don’t sync, but really burn the outlines to DVDs or copy them on external harddrives. And keep the old copies. So far, OmniOutliner has a few potentially data-killing risks (like remove column), but it seems pretty stable. A few times I had this error message:
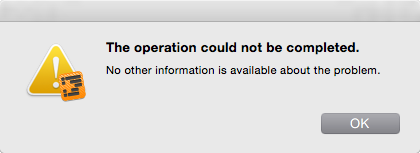
but saving the file, quitting OmniOutliner and reopening it worked. I assume it’s because either I made a mistake (it happened when migrating data from CPN and after a while, I got tired), or because my notebook is dying soon.
When you paste text, it matters whether you have a cursor in a cell or the cell itself highlighted
If the cursor is in a cell, the text gets inserted at that place, if the cell is highlighted, it gets pasted as cells (with new cells for each break).
Migrating Circus Ponies Files to OmniOutliner
Frankly, I’m still searching for the best way to migrate CPN files to OmniOutlines.
Actually, I wonder whether this wouldn’t be something for The Omni Group. They would have the necessary skills to write a program that reads CPN files and uses the information to create an OmniOutliner file with the text and images. Given that both CPN and OO use files that are actually folders and you can read the content easily, it should work. It might motivate quite a few people to use OmniOutliner in the future. After all, CPN is dead and it’s not that we have a choice but to change the app. The question is which app and OmniOutliner might use the situation. It would actually help a lot of people.
But until that happens (or someone else writes an app), here’s a manual way to transfer the contents of a CPN to OmniOutliner.
I would strongly suggest to use CPNs opml export (via File – Export …). It takes care of most of the text — just export the whole notebook except the title page and the Multidex (look at the page numbers on the Contents file and export pages in the “Range from [first used page] to [last used page]”). Open this file with OO, create a new OO file with your default template and copy and paste the parts you want to have into that outline from the .opml file into the OO file. It’s probably a good idea to make OO the default app for .opml files (via the finder, right-click an .opml file, select “Get Info”, go to “Open with:” and select OmniOutliner and select “Change All …”).
However, there are a couple of caveats.
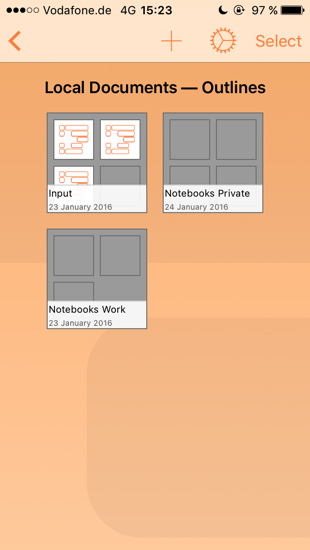
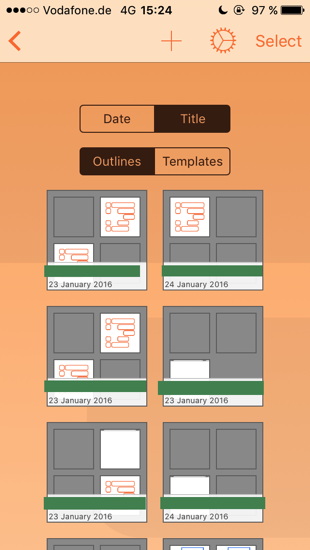
First, either CPN or OO have trouble with CPNs divider pages. I had a couple of instances where the text was exported, but indented. You end up with a file where each divider (I think) is indented by one additional level. I would strongly recommend to move all pages and dividers on the same level in CPN (the top level). You can simply leave the divider pages where they are, just move them all on the top level (see image below).
There also were issues with added semicolons at times, but those instances were rare. Like expected, CPN is no data island, but you carry some sand with you when you leave.
Second, the .opml export does not export media files. So images, sound files, videos, etc. are not exported. You find the files when you open a CPN file in the Finder (via right-click and Show Package Contents, they are in the attachments folder). You could search for the file names and insert the images manually this way. However, take care to create an OmniOutliner file first. Remember that .opml has problems with media files, OO does not. Also, I think manually going through the CPN file and dragging and dropping the media file from CPN into the newly created OO (which has the content from the .opml file copy-pasted into it) is easier. Remember that you can use OO Content window to focus on child cells and expand all of these child cells. And remember to “Expand All” cells of the CPN page first. Otherwise you might miss media if they are in folded in cells.
If you are really pressed for time, you could export the CPN als .opml, copy and paste the content of the .opml-file (opened with OO) into an OO document, then open the attachment folder of that CPN file (via the Finder, see above) and drag and drop all files into the outline as well. That would give you a file with (likely) all information. You could sort it later. Personally, I prefer to go CPN file by CPN file and add the images (and other media) immediately. In any case, keep the old CPN files in case you miss an attachment.
Third, if you have multiple line breaks in on CPN cell, the .opml export might have problems with it. Copy-pasting these directly from CPN into OO works well here. Use “Paste and Match Style” (via OO’s Edit menu or via the shortcut alt + cmd + shift + v).
Fourth, tables don’t work either, however, manually copy and pasting the table seems to work … sometimes. Haven’t found out when it works and when it doesn’t. Worst case: screencapture the table.
I did migrate a couple of CPNs so far. It takes up some screen space and (I found) it works best when doing something else, like watching a movie). It’s a lot of drag and drop from CPN to OO. See the image below for more information.
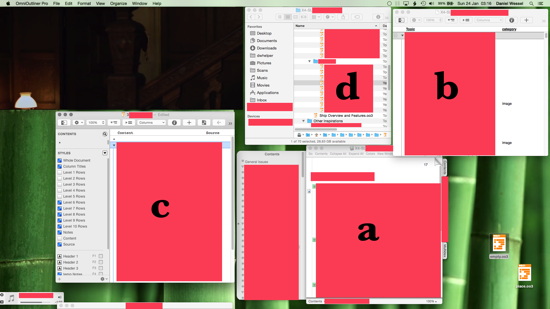
a: CPN file, shows the images and other media file. b: .opml file — exported from CPN, I use it to select the parts of the former CPN notebook I want to copy-paste into a newly created OO, c: a newly created OO file, d: Finder window with the folder structure. Mostly created in advance with copy-pasted and renamed OO files. I find it easier than creating a new outline and saving it in the right place.
Manually adding the media files and going through every CPN page sucks, but on the plus side, you have to change the structure anyway. OO’s are not notebook files. The amount of information of a notebook (between 100 and 280 pages so far) doesn’t fit a single outline. And finding the right level is a challenge. What to group into one outline, when to use folders and when to put a couple of outlines into the same folder. The divider structure of CPN is a good guide, but sometimes I have departed from it, grouped pages into one outline and even split pages into separate outlines. I use the situation to get an in-depth view of the kind of information I have and tidy up the material a little. Then I create the folder structure in Finder, add the OO files (an empty OO file with my template applied), duplicate and rename as needed and go through the CPN pages one by one.
But like written, I’m pretty sure there are easier ways.
Conclusion
In conclusion to this monster posting — sorry, this app is still new to me and I haven’t grasped it completely yet — I think you can use OmniOutliner as a replacement of Circus Ponies Notebook. Sure, some things are different, migration is a pain in the ass at the moment (unless you see it as checking your files again), and a change in structure and behavior is needed. But overall, the iOS support more than compensates for the changes and effort. Because let’s face it, CPNs iOS support was really bad. There’s also something to be said for quick access to outline “pages” (if you put the folder with the outlines in the Dock, you can access them quickly with left clicks).
But like written, I still have a lot to learn about OmniOutliner — sync and the version control are on top of my list. These two features are still unknown to me (if they even exist as expected).
But personally, I’m glad that I have found a working replacement. While I did get sad when going through the CPNs — that program was just … beautiful — I’m glad I found a working replacement.
At least for a while. 😉
Many, many thanks for this thoughtful post. Extremely helpful. In fact, I think you just saved me HOURS of work trying to figure out how to migrate from Notebook to OmniOutliner!
Thank you, but keep in mind that much faster ways are possible, e.g., an app which auto-converts the files. I know that it is possible (I know that much about programming and the files), but not a chance to do it myself (luckily, work is fun at the moment, stressful fun, but the good kind of stress). Still, it should shave a few hours, even if there are faster ways with no possibility for human error (like forgetting to copy-paste media files).
Daniel, you may want to try the benefits of using multiple columns with OmniOutliner and add a column for referencing page numbers on the original sources. I’ve been working with the following scheme: Topic + pp. + reference (source). I take my reading notes using separate oo3 files, one for each source (the file name is a key in a BibTeX database). After I’m finished taking notes for a particular source, I use a script to fill the third column with the document’s file name (see below). Afterwards, it is practical to review those files (they are all indexed in DTP), copying the relevant items and organizing them in a thematically structured outline.
tell application “OmniOutliner”
set docName to name of front document of application “OmniOutliner”
tell front document
try
set rowCount to count of rows
repeat with i from 2 to rowCount
set text of cell 4 of row i to docName
end repeat
on error errormessage number errornumber
display dialog errormessage buttons {“OK”} default button 1
end try
end tell
end tell
Hoi Bruno, that looks very interesting, esp. the script. I’ll have a look at it, thank you 🙂
Have you tried to export from CONas OPML, open in OO?
Hmm, what is CONas? Or did you mean CPN?
Hoi Bruno,
hey, thank you very much for the script. Had the time to try it out and it works like a charm (after changing “repeat with i from 2 to rowCount” to “repeat with i from 1 to rowCount” to get the first row as well, and “set text of cell 4 of row i to docName” to “set text of cell 3 of row i to docName” (in my template, I use the second (visible) column for the source)). But yeah, much, much better solution than using a template that is already filled in. Thank you 🙂
Hi Daniel,
you’ll probably be aware of it, but just in case. If I’m not mistaken, you also use Devonthink in your workflow, and for Devonthink there are a couple of, as I find, really useful scripts available from the Devonthink forum. These automate the process of adding a link to the source and also add the page number (as link) in a separate column. Maybe they are useful for you, in case you weren’t aware of them already anyways.
Link to forum page: http://forum.devontechnologies.com/viewtopic.php?f=20&t=21114
Link to another forum page: http://forum.devontechnologies.com/viewtopic.php?f=20&t=12038&start=20
Best regards,
Thomas.
Hoi Thomas,
thank you for the tips. Yup, I knew that DT has some useful scripts, including one to find and remove duplicates and another to replace duplicates with replicants. But I did not know these forum pages. Thank you 🙂
Best regards
Daniel
Hi Daniel,
I know the original post was months ago, but I thought I’d ask: Did you ever consider using Microsoft OneNote as a replacement for Circus Ponies?
If you did and decided against it I’d love to hear your reasons why. I’m starting a new book project and I’m determined to set my research systems in place before I start rather than cobbling them together as I went along as I’ve done in the past.
Hoi,
yup, I tried it out, but only superficially. Reason being that OneNote required me to register with Microsoft and I am deeply suspicious of Microsoft. So it isn’t a good reason why I cannot recommend or not recommend OneNote, but more personal prejudice. And given that OmniOutliner works well (and the app is quite nice), I haven’t had the reason to look deeper in it.
In the end, it’s a personal decision. Does it help you realize your book project? The only non-person issue I would look into if I were you is how easy you can export the stuff you have entered into OneNote, in case you want/have to leave the program behind.
(Sorry I can’t be more specific here, like written, OneNote and myself … unlikely to ever have a great relationship.)
I wrote to the makers of Outline a couple of months ago to ask if they were going to develop an importer from Circus Ponies. And they have!! Announced at the beginning of this month and I missed it. you can find their blog entry announcing it here: http://outline.ws/blog/how-to-import-circus-ponies-to-outline/#more-839 .
I’m waiting to be sent a link to the importer (still in beta). You might want to try it out too.
Thanks, but….
I will continue to engage in “digital necrophilia” until CPN simply stops working on my laptop. And then I’ll probably keep a laptop it works on.
I want the Notebook Feel.
By the way, the reason the developer “moved on” is because sales dropped. You can thank MicroSoft for that. They shipped OneNote for Mac.
Send jayson@circusponies a note. Tell him you loved CPN. Ask him to Open Source the code.
Beg him to Open Source the code.
Actually the people from Outline contacted me regarding their product. Had a quick look at it and currently not sure whether to review it. Mostly due to lack of time, but also because first impression is that it looks like a data island. I’m missing flexible export options. CPN for all it’s dying had useful exports (could have been better, but I got my info in OmniOutliner outlines now). Outline looks pretty much like a mostly closed system (or is there a Word/rtf export I haven’t seen)?
Thank you for the background info. 🙂
Personally, I most certainly will not beg him. It’s strange that “moving on” was the consequence of dropped sales. I mean, why not create a new version that looks more modern (let’s face it, the design did look old) and address the core audience? I think the time was right for a new version — stable, fast, and totally in control of the user. The fact that you have to register to use OneNote made Microsoft unattractive to me. It’s not “One Note”, it’s “My Notes”. Hmmm, I guess I’m still a bit sad that one of the best pieces of software I have ever used “simply” folded. It smacks like hurt ego to me, not “we cannot sell our product anymore”. And I remember a tweet by him dissing OneNote. Yep, there’s something else going on here … and there would have been other options.
But who knows, perhaps he needs a time out and comes back to the business with a different approach. Not sure I would trust his products anymore (not an issue with easy import/export), but I would love to see another good notebook app.
Ah, one other thing. The disadvantage with “digital necrophilia” is that one day or the other, the cadaver will simply disintegrate. The software will not run on the current OS and no available computer will support the old OS. Might take 5 or 10 years, but it will happen. And then you have missed the time to transfer your data to another app (and created much more data).
Thank you so much for this post, which helped ease my own transition from CPN to OO. I’m just getting used to the new program and feeling pretty good about it. One function I have not been able to find in OO is page navigation: e.g. a command that allows me to go to the last viewed page, and back again. Have you found a way to do this kind of navigation with OO? The “focus” and “unfocus” functions are not what I’m looking for –
Hmm, no, don’t think so. Would be possible to program it if the developers decide to implement it, but the overall metaphor isn’t a notebook with individual pages like in CPN, but one vertical outline. So that’s probably not a priority for them. Best course of action would probably be to contact OmniGroup and ask for this feature. Essentially a breadcrumb/thread of the last clicked cells, two icons in the tool bar, that’s it.
Hi – One thing I haven’t yet tried is your (Daniel’s) technique of adding a tag to a big of information. Seems clunky. Not sure if it’s useful — I wrote a script to copy a column. If somebody wants it, post here and I’ll send it along. Like all things OO, it’s squirrely. I find it to be the best at what it does, but not my ideal
Hoi Amy,
I’m happy to post the script. I like Bruno’s script and still use it (with these modifications) but I am always happy to provide other ways of doing it. 🙂
Hate that OO is the only viable oprion. It’s a poor second best to what circus ponies was. But the epic dummy spit by Jason at those stupid enough to buy his software and get into it has really made a mess. He should have given some warning. Was a contemptuous way to fuck over his customers.
Yep, here’s hoping that more people develop the potential of outliners and some more competition appears. After all, there is a huge potential for an outliner that works on Mac and Windows PC and it is not that hard. At least, to provide the basic functionality.
I have also transitioned to Omnioutliner Pro from Circus Ponies Notebook. I keep the left column opened to ‘Sections’ repeating the CPN ‘Contents’ pop out for the currently open Notebook. To return to the multiple ‘Notebook’ paradigm of CPN, I changed the setting for Recent Items in the Mac Preferences / General from 5 to 50. It’s pretty quick to find and open any other Omnioutliner ‘Notebook’ that I have recently used. For the Multidex I’m using Spotlight which is fully functional inside of Omnioutliner files. I’m very happy with how well Omnioutliner has worked out.