If a thing is worth doing, it’s worth doing well — unless doing it well takes so long that it isn’t worth doing any more. Then you just do it ‘good enough’.
“Programming perl” by Wall and Schwartz
I work with different screen setups and different dock positions on my Mac.
Usually, I use one external screen with the dock on the right and auto-hide turned on. I want the whole screen, and if I need the dock, I just move my mouse cursor to the right until it hits the borders of the screen. Quick and efficient.
But there are moments when I need a second external screen. This second external screen is connected only if I need it — I just plug in the VGA adapter into the USB-C port. It is very useful when discussing with students, as it sits on the table to the right of my desk where the students sit.
But when the second screen is added, the dock on the right side does not make sense anymore. It is way too far on the right side. Changing the screen position in OS X does not make sense either, as it would clash with the physical layout.
So in these cases, I much prefer the dock to be on the first external display at the bottom.
The usual solution would be to change the dock settings manually — either via the dock or via System Preferences (the only way if the dock is out of reach). But this way is tedious and not very efficient. Too many clicks, esp. if you change position and auto-hide.
Looking online, I found this great tip to use an Apple Script to change the dock position. A quick search on stackoverflow revealed the missing information for auto-hide. Combined it resulted in the following script:
tell application "System Events"
  tell dock preferences
    set x to screen edge
    if x is not bottom then
      set properties to {screen edge:bottom}
      set autohide to false
    else if x is bottom then
      set properties to {screen edge:right}
      set autohide to true
    else
      set properties to {screen edge:right}
      set autohide to true
    end if
  end tell
end tell
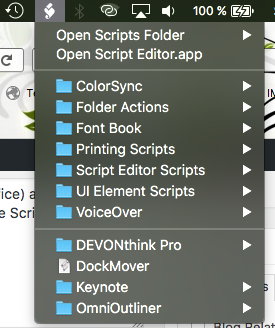
To use the script, just use the “Script Editor” that comes with OS X, copy-paste the code into it and save it either as a script or an application. Both work. Put the script into the scripts folder (the script menu has an option to open the scripts folder, use the User Scripts Folder which is under \Users\USERNAME\Library\Scripts). Executing the script will move the dock position and depending on the position activate (right side) or deactivate (bottom) auto-hide.
As usual, no warranty, but another example of how powerful Apple Script is. I assume it would be possible to trigger this script if another screen is connected, but that’s beyond my abilities at the moment. Still, given that the script is now easily available in the top bar, a tedious changing the settings click orgy turned into two clicks. And of course, if you want the dock in different positions, just replace right, left, bottom, etc.