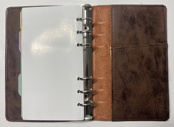
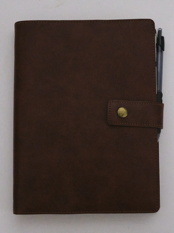
How to create a content outline in Circus Ponies Notebook

I prefer winter and fall, when you feel the bone structure of the landscape – the loneliness of it, the dead feeling of winter. Something waits beneath it, the whole story doesn’t show.
Andrew Wyeth

I have written about structure vs. content outlines yesterday (well, before I went to sleep). Your guidelines (e.g., for a thesis or article) give you the information of how to create your structure outline. But how do you create a content outline?

The outline needs to contain all the information you need to have available for writing, so that you can write without having to refer to other information sources (which interrupts the writing process).

1. Generate the rough structure (the Introduction — Main Part — Conclusion thing)

  • This is similar to a structure outline.

2. Put in all information you need, all the data, the graphics (preliminary versions are sufficient), etc.

  • Keep in mind that you need the bones of the text Use keywords not finished/formulated sentences, as the later “stick” together and you cannot easily rearrange the structure even when necessary (e.g., “Thus, …”, “This means …” cannot be moved without also moving the sentence before). This said, if you have a good idea for a sentence, write it down – you can decide later whether you use it (as is or for inspiration) or not.
  • One line/cell of the outliner for one piece of information.
  • Keep a hierarchical structure.
  • Elements of the same order (e.g., “Introduction”, “Results” should have the same indent depth, allowing you to fold in entire sections of the text later when writing).
  • If you put in a lot of data/complex information, write a short summary in its parent cell – this way you can fold in the details and concentrate on the overall picture.
  • The goal is to get a detailed structure and all the necessary information available.

3. Check the content

  • Is all information available?
  • Are all links/references to other parts of the text specified?
    (fold in the sections to compare information that is – usually – far apart and make explicit references, e.g., between discussion and results, or between introduction and conclusion)

4. Reorder the information to produce a red thread

  • Order the outline as a whole first (read it from top to bottom) then read/order each section again before writing it.

5. Write the sections

  • If you have a writers block while writing, you have most likely a problem with the structure, review it first (the advantage of having “only the facts” is that you have invested relatively little and can quickly change the structure).

It’s very easy to make a text out of these facts if all information is collected in one central document (the outline). When my outline for my PhD thesis was finished (took quite some time) I was able to write the dissertation thesis in 30 days.

Outliner in Scrivener vs Outliner in Circus Ponies Notebook — Structure (Scrivener) vs Content (CPN) Outlines

In all affairs it’s a healthy thing now and then to hang a question mark on the things you have long taken for granted.
Bertrand Russell

I got the following question from Carsten yesterday:

“you have mentioned Circus Ponies Notebook as an outliner. Scrivener has an integrated outliner – what are the advantages of outlining with Circus Ponies Notebook’s compared to outlining with Scrivener?”

It’s a good question, because there is a fundamental difference between Scrivener‘s outliner and an outliner like the outliner pages in Circus Ponies Notebook or of OmniOutliner.

Let’s have a look at the outliner in Scrivener first:

scrivener-outline

Scrivener Outline View (left: Binder, right: Outline View)

As you can see, each “cell” (= line) in the outliner view of Scrivener is a “file”. It shows you more information like label, status and (not shown) even part of the content, but it is — essentially — the Binder in another format. It’s a view on the structure of your document. If you double-click on a line, you open that file:

scrivener-design

After clicking on a "cell" in the Outline View of Scrivener

Now compare this with the outliner in Circus Ponies Notebook:

cpn-outline

Outline in Circus Ponies Notebook

In Circus Ponies Notebook you can use one cell for one information unit (an idea, a quote, etc.). It is much more fine-grained. Like in Scrivener, you can fold (collapse) cells so that all subcells are hidden.

cpn-data

Very useful for a hierarchical structuring of information.

Circus Ponies Notebook also allows you to add images and summarize information in the parent cells (here for example the “interest for nanotechnology” cell which contains detailed information about the four groups, complete with an image of the ANOVA and the detailed statistical values). Great for summarizing what complex analysis say and seeing only the summary during the writing process.

cpn-images-xls

Support any file type.

You can also add files, here for example and image and the Numbers document it is based on.

cpn-quellen

Each cell can be tagged with the source information of the content of that cell.

And — very important for academic writing — you can tag each cell with a keyword, which can be used to stick the source information to any quote or information you want to use in your article or thesis. In the image above for example one cell is tagged with “Hawkey, R. (2004)” and contains some information what I wanted to use from this source. The cells tagged with Borwoske (2005) contain direct quotes (italics). See Circus Ponies Notebook for Academic Writing (e.g., Thesis Writing) for more information.

Of course the cells can be shifted around, copied and pasted, and if done correctly (simple copy and paste) the tags stay attached to the cell. Very, very useful. You can also collect information in a dedicated notebook and copy and paste the cells in a new notebook, in which you put what you need for writing the article. And given that you can add a checkbox to each cell you can always stop and resume writing and know where you stopped. I strongly recommend using meta information, for example what should be in a section or what should be clear after reading a section, in the outline. If you look at the first Circus Ponies Notebook image in this posting, you see orange text as a child cell under the Method section parent cell (“show what was done …”) and likewise as a child cell under the Design parent cell (“begins with an overview …”). Sometimes it is hard to remember during writing what a section is supposed to accomplish and this meta information (in another color and with checkboxes) is a tremendous help.

So, in Scrivener one outline “cell” is actually a text file — it is a structure outline. Very good to get an overview of the document, see which “sections” need work (e.g., status as First Draft, Word Count). But even if you display the content of this cell in the outline view, a single “cell” (= line) usually contains more than one idea, which makes it very hard to change the structure as sentences tend to stick together. Thus, it is very useful for higher order structuring like part, chapter, subchapter, even on a paragraph level. But you probably wouldn’t want to use it on an argument/idea/information unit level. Personally I went so far to use separate files for subsections, but not for paragraphs, i.e., one subsection (like the “Design” section below) contains multiple paragraphs and ideas.

scrivener-design

A "cell" = text file in Scrivener contains more than one idea ... here, multiple paragraphs.

In Circus Ponies Notebook one cell contains one unit of information/one idea/argument. If I have taken it from another source, the source information is tagged to that cell (assigned as keyword, which can be views with cmd + k). This kind of content outline is made to have its cells reordered, folded in, shifted around. I change and simplify the structure during the planing phase when I put information in this content outline by summarizing subcells in their parent cells (e.g., multiple sources say the same, the parent cell thus contains a summary). When writing I can use the summary or go into the details, depending on how much space I have during writing.

reducing-extraneous-load

Circus Ponies Notebook (left) next to Scrivener (right) -- a very good combination.

In practice, both types of outlines combine perfectly, and although in almost every case, a content outline is also a structure outline, it is helpful to use Scrivener and the Structure Outline for writing. I start with Circus Ponies Notebook to create the content outline, make sure I have all information available in it and the structure works (thread/story). Then I fire up Scrivener, use the Binder to create a structure outline (on a higher level, see image), put the Circus Ponies Notebook content outline next to the Scrivener file and start writing.

Circus Ponies Notebook excels when it comes to keeping the content available, giving me the source information (keywords), allowing me to fold in information that I do not need (e.g., level of detail is too high), and having cells with checkboxes, which allows me to easily stop and resume my work.

Scrivener excels in writing, especially making Snapshots of prior versions, giving me word counts, and quickly jumping between places in the document (via the Binder of Scrivener which only contains the higher level structure and the text files).

Docear — Literature Management and Writing with Mind Maps

Words – so innocent and powerless as they are, as standing in a dictionary, how potent for good and evil they become in the hands of one who knows how to combine them.
Nathaniel Hawthorne

Kurt wrote me a comment about docear, a software that integrates a PDF reader (with annotations) with a Mind Mapping tool. And the software really integrates them, like reading the annotations/highlights and making them available in the Mind Map. The following video gives a good introduction:

Whereas annotations and comments in PDFs are nothing special, I really love the way the highlighted sections and comments can be automatically extracted from the PDFs. This is something where many literature management tools are lacking: I can annotate or highlight in my PDFs, but I want more … I want the text available outside of the document. And looking from the video, docear can give you this. Likewise, using Mind Maps for writing is an interesting idea (cf. this posting about writing articles with Mind Maps).

However, I am not so sure whether the approach be docear does scale to literature management. A Mind Map is a hierarchical structure, and in many cases, one might want to put one paper in different sections or categories. One reason why I use DEVONthink and tags for my literature. Likewise I want to be flexible in the way I work and use Circus Ponies and Scrivener for writing. Also, I am unsure whether I would trust my literature to one software, also I expect that the PDFs are annotated in the files itself and can be exported — and thereby still be used without the program.

But it looks like an interesting idea if this is the way you want to work. If Mind Maps are your way to work, why not use a program that combines your literature management software and your Mind Map for writing in one package? However, what I can say about the software is limited, as I do not have the time for an in-depth testing at the moment. If I had, I’d make sure that my PDFs can be exported (with annotations/highlights) and use a naming scheme like author_year.pdf or author_author_…_year.pdf to make sure I can leave the software if I need to, then give it a try.

So, what are your experiences with it? Would you try docear?

Stack Exchange — A great place to get answers to questions

“There are Lupines out there.”
“This may sound like a really stupid question, but is this a problem?”
“Considering they want to kill us, um, YES!”
MacGregor and Jonathan

stackexchangeA few different people recommended Stack Exchange recently. It is a very interesting “network of 82 question and answer sites” (including cooking, statistics, photography, and yes, also personal productivity). What makes it different from typical FAQ sites and forums is that it is community driven, allows you to edit your questions (and answers), and it uses voting to get the most helpful/best answers to the top. Very useful to quickly get a good answer to a question that bugs you — I used the predecessor site StackOverflow to solve programming questions and opening up this principle to different topics when enough experts are available is a really great idea.

So, if you are learning something (or if you have acquired substantial knowledge and want to contribute), I highly recommend Stack Exchange.

Not perfect? Try Again.

Assiduus usus uni rei deditus et ingenium et artem saepe vincit.
(Constant practice devoted to one subject often outdoes both intelligence and skill.)
Cicero

A few weeks ago, I went to a Botanical Garden with a very interesting young woman … to take photos. We are both still (and will always be) learning how to take photos, so only some photos turned out fine, but even most of those were only almost good. There often was this tiny detail that looms large if you know where to look: A wrong splotch of color in the background, the sharpness a little bit off, these kinds of things. Digital photography allows you to see the photos on the camera screen immediately after you take them, yet the quality and size of the screen is usually not good enough to notice all these tiny flaws (and the next motif is already calling). But it is a Botanical Garden, the plants will not run away, and at least the tropical flowers will look almost the same — why not visit it again?

I think you learn a lot when you revisit the same motif again. Just make sure you remember what you wanted to avoid. An easy way to remember is using a template, e.g., in PowerPoint or Keynote, and simply annotate what you want to avoid. You can define an image area and text field for the meta data and points to adhere to with this motif. After adding the image, highlight the issues on the photo and write the main points on the slide:

phototemplate_500

Export the slides as images (jpg) and put them on your mobile phone or your camera (try it out in advance, not all cameras accept .jpgs that were edited), or simply print it (you can print more than one slide on a page, 6 per page usually work fine). In contrast with simply leaving the images on your camera, you do not have to think on the set which points to adhere to, and if you put them on your mobile phone or print them, you do not scroll through the photos again and again.

You will probably make new mistakes when you revisit the same setting (things to avoid next time), and some things might be different (damn plants, and these are slow to move ;-) ). But there is no reason why a photographer should not revisit her motifs like a writer would rewrite a text. And I think it is a great way to become better.

Update

A good book to help you evaluate images is “Vom Alltäglichen zum Besonderen: Bilder auf den Punkt gebracht” by Michael Jordan (not that Michael Jordan). Apparently it’s only available in German, but the author shows images and highlights areas of improvement (similar to the slide above, and I guess that’s where I got the idea before transferring it to immediately improving your next photos by revisiting the motif and taking your annotations with you in an easy way to help you remember what to do). You can look into the book but you have to turn a few pages to see the example photos with his annotations.

Scrivener Introduction Video

I have recommended Scrivener — for me the best writing software ever — multiple times. It is hard to give a correct impression of the advantages, but the posting Scrivener — A perfect program for dissertation writing tries to give an overview. It is my most frequently read posting. However, some people might like a video and there is an excellent one linked on the Scrivener Trial page, or available on YouTube. The creator of Scrivener, Keith Blount, gives a 10 minute introduction of the program:

Highly recommended, especially if you combine it with a good outliner like Circus Ponies Notebook, and available for Mac and PC (Windows).

Task Management with OmniFocus

“Sure, I had tried out the Hipster PDA (verdict: too hipster), read up on the Moleskines (verdict: too much pressure to be the next Hemingway and Picasso), and even thought about Getting Things Done, but I just wasn’t up to the task.”
Bill Westerman on http://www.utilware.com/gsd3.html

omni_focus_iconI’ve already written a short entry on OmniFocus when I started to try it out end of November last year. After almost two months of experience with the program, I really like it — and what’s important, I think it helps me do my work more effectively.

Here’s a short overview of my workflow, somewhat inspired by the excellent series at asianefficiency.com:

Short work description and programs/apps used

I am a scientist. Most of my work is in the office behind a computer, so I can use the desktop version of OmniFocus. However, I also love to walk — for good reasons like health, time for ideas, fresh air to clear the head — and I spend about 60 to 90 minutes each day walking (30 to 40 minutes for each way to and from the office, some walking during the lunch break). And I love to use that time – including for task management and actually doing the task. Given that I can type while walking without walking into lampposts, I use the time to go through my day, plan the next actions, and do as many as I can (you can do a lot with mobile eMail). So I use the OmniFocus App as well — and far more frequently.

Adapting and Using the OmniFocus App

You can and should configure the App in many ways, and given that the desktop version mirrors this structure I focus on the mobile version here.

omni_focus_overview The overview of the App is reordered to have the most frequently used actions on top (easier to reach when holding the device in the right hand and typing with the right thumb).

  • Inbox — if I quickly need to capture a task without having the time to sort it into the correct project.
  • Projects — all projects (see below)
  • Flagged — you can flag action selectively. I use this feature extensively to decide which actions I want to do on that day (and only those actions I want to do on that day!). See below.
  • Forecast — beautiful view of the tasks that are due today (according to due dates, not according to flag status).
  • Contexts — Tasks have a context, usually used to describe the places or circumstances you need for the task, e.g., some tasks can only be done at home (e.g., repair the roof), others require specific people, etc. See below.
  • Map — If you have set locations to your tasks. I do not use the map frequently enough for it to be of use to me.
  • Search — like the name says.
omni_focus_rituals

Rituals (idea from asianefficiency.com) is the first project I open each day on my way to work. It has six repeating tasks that reappear each day. Going through these rituals helps me to prepare for the day.

As you can see, I review my annual goals (because otherwise I forget them), my monthly goals (work and private — monthly because this is the largest time horizon I can sustain), review my calendar for tasks that absolutely have to be done today (usually meetings or other time critical stuff), review the waiting for context (all tasks with the context currently set to “waiting” are listed there, useful to remind others of their tasks ;-) ), process the Inbox (e.g., assign projects and contexts to these tasks) and finally — and most importantly — pick the most important task for the day.

omni_focus_flagged

I flag any actions that I want to do on the given day — and only those actions I think I can actually do. Reason being I think if you have all your tasks visible you have to do, it overwhelms you and you are prone to do nothing. Thus I plan each morning after reviewing the information in “Rituals” (see above) what I can actually do on that day. If I finish early, great, if not, I plan more carefully the next day.

Of course, there are other pressing tasks that I would love to do that day but really cannot. So I have a second layer of tasks that are critical. I use a context (see blow) called “Do (soon)”. Each task that I should do soon gets this context, in comparison to the normally used context “Do” (for a task that is not so time critical). Point being, I can quickly see which tasks are also pressing, yet I only see the tasks I have to do today.

Note: I rarely use “Due” dates, because for fixed appointments I use the calendar (which fulfills a different purpose than a task manager) and which data OmniFocus also shows (see “Forecast” below). Other tasks are often time criticalbut not that critical to do on a specific day, so due dates do not make that much sense for me.

OmniFocus shows you the Task and the Project (smaller in gray) below the task. This is usually all you need. You can put in more information, including longer text notes, images and sound recordings in the task entry.

omni_focus_projects

Projects gives an overview of all the tasks, sorted and grouped into projects or project folders. They can be sequential (first task in project has to be carried out before second task, etc.), parallel, or single actions.I use two folders — private and work (see below), a sequential project called “Rituals” (based on asianefficiency.com), and three single actions projects (annual goals, private monthly goals, work monthly goals).

OmniFocus is great in giving you exactly the information you need, e.g., the amount of projects, how many are overdue or due soon, and it allows you a quick view on all remaining actions.

Note that “Annual Goals”, “Monthly Goals (work)”, and “Monthly Goals (private)” are not tasks per se that are integrated into “Work” or “Private”. They are high-level reminders. Whereas they get checked when they are completed, it is the tasks in “Private” and “Work” that I refer to in doing them. The reason for having them as single “tasks” in an extra project folder is that I have a lot of private and work projects, but not all are goals for the given month or year. That is a conscious decision where a simple review of the “Private” and “Work” folder would overwhelm me each day.

omni_focus_private

I have split the projects in two general categories — private is the first one (I’ve covered some text because — well, it is private).

There is “Single Actions” for all the miscellaneous stuff that does not warrant an own project, some projects that are important to me, and a “Private Someday/Maybe” section for all the future stuff I would like to do. I strongly recommend keeping such a list — it keeps the ‘more distant wishes’ away from the current todo’s …

omni_focus_work The equivalent for the work projects. As with the private projects, one “Single Actions” project for miscellaneous stuff that does not warrant an own project, some projects (including teaching and publications, sorry for the German-English mix here), and of course a someday maybe folder (not visible).
omni_focus_contexts I use only a few contexts, as most of the work I do couldbe done anywhere.

  • Do (soon) — For tasks that are time critical yet not fixed to a given date.
  • Do — All other tasks I simply have to do, no matter where.
  • Errands — The only location specific task, or rather, the context that specifies that it is neither the office (sorted under work projects) or (most likely) home (sorted under private projects).
  • Waiting — Important context, each task where I have to rely on/have delegated the task to someone else gets this context. It’s no longer a “Do” or “Do (soon)” context because I cannot do anything but remember the person to do this task. I check this context each day during the “Rituals” (see above).
  • Annual Goals, Monthly Goals, and Rituals have these contexts to prevent interfering with “Do” or “Do (soon)” tasks.
  • I do not useoffice“, “home“, or “people” contexts, because most of my work tasks I can do anyway, I look at my private projects usually at home (or on my way home), and I love eMail communication so there is no need for a people context because I can reach them anytime and anywhere.
omni_focus_forecast Forecast is a very interesting function that brilliantly displays a lot of information.

  • On top it shows you the overdue tasks (here: 4 in the Past, it doesn’t matter really when they were due, I missed them, that’s what counts), the tasks due today (here: none), and the tasks that are due in the next four days and in the future (here: 6 on Monday — my rituals, 1 on Wednesday, 1 on Thursday, 5 in the Future).
  • Due Today would show tasks that are due today if there were any.
  • Calendar Events access your calendar and shows the appointments of your calendar. Very useful and very interesting view — if it were a time-frame it would show small bars, giving you a good overview of the day in minimum space.


Working with it

I think what makes this solution work for me is that I have integrated it into my daily life. I walk to my office and have time to review and plan the day (and do those things that can be done via a quick eMail). I can use my iPhone with only one hand (using the other for the coffee I drink while walking or the umbrella if it’s raining).

What matters to me is that I have a view (flagged tasks) where I see only the tasks I have planed to do that day, preventing me to be overwhelmed (I have configured OmniFocus to show me only the flagged items as badge count, which makes sense regarding the way I use it). At the same time, I can easily see my goals for the year, or month, or all my work and private projects (and their specific sub-tasks), allowing me to see the big picture easily (at least regarding the tasks — the why is something different).

It also matters that I can add new tasks quickly, even when I am on the move. All data I enter, e.g., while walking to another office at work or while going through the city, is immediately synced with the Desktop version of OmniFocus. I do not think about backups here, OmniFocus does this for me.

Likewise I adhere to David Allen’s golden rule to do any task immediately that takes less than two minutes, and I have tweaked this rule a bit (i.e., improved my infrastructure to make more possible within two minutes).

And finally the often mentioned but rarely adhered rule: Tasks should be easily implementable. Make them concrete and think what the next step is you have to do, instead of just writing down what you want to achieve (exception: high-level goals that serve purely as reminders).

Final comments

This way of using OmniFocus is a little different than the ways proposed on asianefficiency.com. And I think that’s an important aspect: A task management system must work for you and you have to try out a few things to find a solution that works for you. Luckily, you notice the amount of work you do and whether you are happy with the solution or not. OmniFocus is — unfortunately — quite expensive, but it offers you a lot of choice how to configure it and the way the information is presented and the ease of use is … just remarkable. I can highly recommend it — try out the trial version. If it works for you, great, if not, look around until you find something that works for you — and I also recommend the link in the quote at the beginning of this posting for a completely different but for some probably more effective way to deal with tasks.

OmniFocus as Task Manager

How this feels is I’m just another task in God’s daily planner: The Renaissance pencilled in for right after the Dark Ages. The Information Age is scheduled immediately after the Industrial Revolution. Then the Post-Modern Era, then The Four Horsemen of the Apocalypse. Famine. Check. Pestilence. Check. War. Check. Death. Check. And between the big events, the earthquakes and tidal waves, God’s got me squeezed in for a cameo appearance. Then maybe in thirty years, or maybe next year, God’s daily planner has me finished.
Chuck Palahniuk

I’m currently trying out OmniFocus as task manager. I tried out some other programs before (including Things), but difficulties with synchronization made Things not that comfortable to use. OmniFocus seems to solve the matter much better and the interface is really thought out well, especially on the iPhone (and you can configure parts of the desktop version). The main disadvantage is the price, if you want to use the desktop (63€) and the iPhone version (16€) it’ll cost you (no reduced price for both!). On the other hand, this program does not make that much sense if you do not have it available on your mobile and on your desktop. Currently I spend the time walking to the office planing my day, but using only the iPhone version is not comfortable enough. At least you can trial the desktop version for 14 days.

I could write a little about task management here, but for the moment I’d like to point to the excellent series about OmniFocus at asianefficiency.com. I think it covers a great deal of the things you might want to know about using task management systems and I can highly recommend it.

Writing Articles with a Mind Map

“I have plotted it out — now I only need to write it.”
Some New Yorker Comic

A colleague of mine writes the papers for his dissertation at the moment — using mind maps. While I prefer Circus Ponies Notebook and Outlines, I think his approach has a lot of merit for the more visually minded.

The uses the nodes of the mind map to create a structure he can easily grasp and the commentary fields to the nodes to write the text. The mind map structure gives him a hierarchical order (indispensable if you want to make a text out of it) and the ability to quickly reorder elements of the text. If the work is finished, he exports the mind map as text, which gives him a good first draft of the final text.

According to my colleague, a lot of people work this way and use the platform-independent and OpenSource program Freeplane.

Perhaps this approach is something for you.

mind-map-writing-1

mind-map-writing-2

Images Copyright by Christian W. Michel

Poster: How to Organize Your Creativity?

I have translated the poster I did for the MinD-Akademie 2011 in English. I love it — it shows on one (very large) page the whole concept that I try to convey with “Organizing Creativity”. If you prefer it in German find the German version here.

I will probably do a similar version for the second version of the Organizing Creativity Book (still working on it) and use it as navigation help for the Organizing Creativity Wiki (likewise still working on it). But until both are ready, have fun with this poster (note: due to the size — DIN A0 — it is about 7 MB).

oc-poster-englishThe poster shows the different steps that are necessary in organizing creativity. While the process goes top down (yellow arrow in the horizontal center), each step is also another occupation with the topic (yellow arrows upwards to occupation with the topic), which leads to further ideas. I have left the footer for the moment — in case you are wondering it translates as “MinD-Academy 2011 — Future and Research”.