«To the wise and understanding reader, wisdom is to a man an infinite treasure for she is the breath of the power of god.»
Lady Mechanika
To be honest, I’m not the type to color, but I’m a fan. It can be nice to shut off the brain for a while. But if you want to color, you need paper and color pencils (good ones). They deplete and you have to carry them around.
Much easier to just use an iPad Pro — or similar tablet with a digital pencil.
There are a couple of ways you can easily create a small coloring book on the iPad — I’m looking here at using GoodNotes and a real sketching App (like Autodesk SketchBook). In both cases you should prepare the image first.
Preparing the images
If you google, you find lots of images that can be colored digitally, or you buy a coloring book (e.g., these ones, which are great and I’ll be using for this example) and scan the pages (in black and white). Next, take the digital image and turn the white background transparent (usually via the tools, something like transparency or alpha channel).
It’s really important there aren’t any colors but black and white in the image, so everything that is not a black line is turned transparent. Transfer the image (e.g., as .png file, which keeps the transparency) to the iPad.
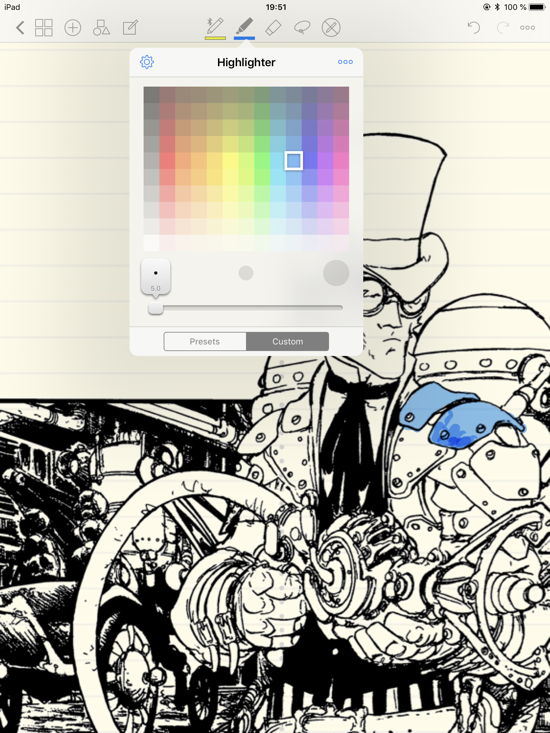
Coloring with GoodNotes
If you use GoodNotes, simply add the image to a page. You can then use the Highlighter to color the image or even the fountain pens. However, the highlighters are more forgiving if you don’t work exactly, and you don’t really cover the black lines of the image.
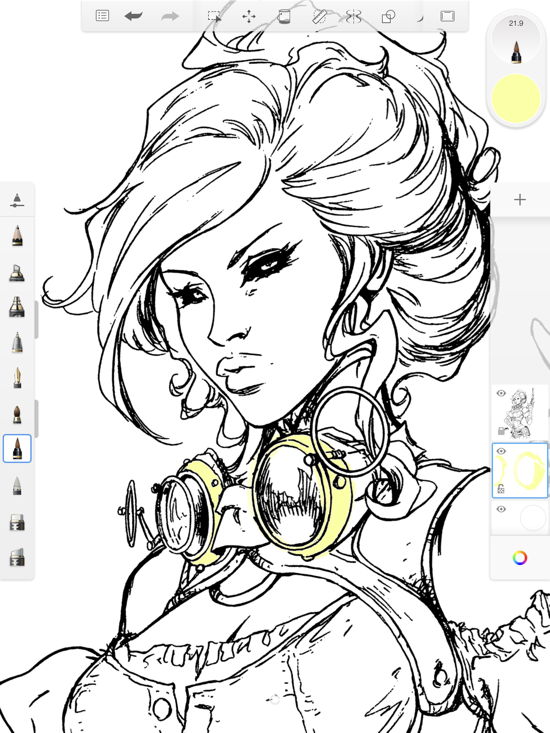
Coloring with SketchBook
Coloring is more fun with a sketch app that supports layers — and here the transparency of the image is important. Use, e.g., Autodesk SketchBook and open the image. Lock this layer. Then add another layer below the locked image layer and color on this layer. As everything on the image but the lines is transparent, you can color away and the lines (on the layer above the colored layer) will always be visible. No matter the pen, you can’t color over them. And there usually are lots of different types of pens.
Works like a charm 🙂